As societies grapple with issues of safety and security, the importance of responsible gun ownership is more evident than ever. While debates around gun control continue, individual accountability remains at the heart of the issue. Embarking on the path of gun ownership is not just about selecting a firearm; it’s about where and how you choose to make that purchase.
The foremost step in this journey is to buy from a trusted gun provider, ensuring that you’re not inadvertently supporting illegal or unethical trades. A reliable way to verify the credibility of a seller is through Arms Directory. Such gun community platforms as well as gun review sites act as a shield for potential buyers, filtering out dishonest dealers and offering a list of recognized and reputable providers. By starting your gun ownership journey here, you’re taking an essential step toward safety and legitimacy.
Buying Your First Gun
Entering the realm of firearm ownership is both an exciting and profound commitment. It symbolizes an individual’s decision to exercise a right, but it also highlights the weight of responsibility on their shoulders. The first step? Ensuring you make an informed and safe purchase.
Begin by researching and understanding the specific needs that drive your decision. Are you seeking home protection, engaging in sports shooting, or looking for hunting equipment? The purpose will guide the type of firearm best suited for you.
Equally important is the source of your purchase. Not all gun businesses are created equal. It’s vital to select a seller known for their integrity, transparency, and adherence to the law. Consulting trusted platforms can steer you clear of unauthorized or questionable dealers.
Education shouldn’t end post-purchase. Engage in firearm training courses tailored for beginners. These offer invaluable insights into safe handling, maintenance, and storage.
Lastly, familiarize yourself with local, state, and federal laws pertaining to gun ownership, usage, and transportation. This legal foundation ensures you remain compliant and aware of your rights and obligations.
In essence, buying your first gun is a blend of research, careful selection, and commitment to ongoing education.
Owning a firearm is a significant responsibility – a commitment to safety, education, and respect. And as with any power, it must be wielded with care, caution, and consciousness. Therefore, we’ve built this checklist to help gun owners stay on the safe side.
1. Education is Key
Before ever handling a firearm, arm yourself with knowledge. Participate in accredited firearm safety courses, even if they’re not mandatory in your region. They not only teach gun handling but also instill a deep respect for the power you wield. Regularly refresh this knowledge to stay current, as techniques and best practices may evolve over time.
2. Safe Storage
Guns and ammunition should be stored separately in locked containers, safes, or cabinets, out of reach from children and unauthorized individuals. This safeguards against accidental discharges and theft. Consider investing in quick-access safes if you’re keeping a gun for home defense. Such safes ensure security while allowing swift access in emergencies.
3. Maintain Your Firearm
A well-maintained gun is a safer gun. Regularly inspect, clean, and service your firearm to ensure it functions as intended. A neglected firearm can misfire or malfunction, leading to potential injuries. Familiarize yourself with your gun’s manual and heed the manufacturer’s maintenance guidelines.
4. Practice Regularly
Owning a firearm is a commitment to skill acquisition and maintenance. Visit shooting ranges to hone your marksmanship and handling techniques. Practicing helps embed safety procedures into muscle memory, ensuring they become second nature. Additionally, practicing under different scenarios prepares you for various real-life situations.
5. Always Assume a Gun is Loaded
This golden rule can never be overemphasized. Regardless of your memory or the last time you checked, always treat firearms as if they’re loaded. This mindset reinforces cautious handling and minimizes the risk of accidental discharge.
6. Finger Off the Trigger
Your finger should rest outside the trigger guard and along the side of the gun until you’re ready to shoot. This prevents inadvertent discharges that could result from sudden movements or reflexes. Only when you’ve made a conscious decision to shoot, after ensuring your target and its background are safe, should your finger move to the trigger.
7. Be Aware of Your Target and Beyond
Understanding what lies beyond your target is as crucial as the target itself. Bullets can penetrate various materials, and there’s a risk of over-penetration or missed shots. Always be certain of the trajectory and potential resting place of your bullet. This ensures you don’t inadvertently harm unintended targets.
8. Secure Your Firearm
Whether at home or on the move, ensure your firearm is secure. When carrying, use a holster designed for your gun model, providing trigger protection. Holsters prevent accidental discharges and ensure consistent orientation, making it easier to draw safely and effectively.
9. Report Stolen or Lost Firearms
The moment you notice your firearm is missing, report it. Quick reporting can prevent potential misuse, protect the community, and possibly aid in the gun’s recovery. Understand that a lost or stolen firearm can be used in criminal activities, emphasizing the importance of immediate action.
10. Stay Updated on Laws
Laws surrounding gun ownership, storage, transport, and usage are dynamic and can change based on legislative decisions or societal shifts. Regularly review your local, state, and national regulations to remain compliant. Not knowing the law isn’t an excuse, and violations, even if unintentional, can have severe legal consequences.
Wrap-up
Responsible gun ownership transcends the mere right to own a firearm; it emphasizes the profound duty accompanying this right. From the first purchase to everyday usage, an unwavering commitment to safety makes a crucial difference. By diligently following the above rules and prioritizing continuous learning, firearm owners can cultivate a safe environment for themselves and the community. Always remember, with the privilege of gun ownership comes the inherent responsibility to protect oneself, loved ones, and society at large.
Train, train, train. That advice is all the rage these days, and that’s not a bad thing. Whether you’re stepping into the octagon, tuning up your mile pace for a marathon, or finally entering that spelling bee, the more you train, the better your odds of success. As hunters, however, that advice can get a little muddled, as our preferred activity actually encompasses quite a few different disciplines. So what exactly is “hunting training”, and how does hunting training improve your hunts?
Longer in the Gym, Farther in the Field
Unless you’re simply sitting on a ladder stand all season (and even then, it wouldn’t hurt), staying physically fit is key. Some of the biggest, baddest animals reside in the heart of the thick stuff, and why wouldn’t they? If they’ve lived long enough to become true trophies, they know a thing or two about keeping away from where people are and staying where people are not. Why are there no people there? Most can’t (or won’t) get there.
This isn’t a physical fitness blog and doesn’t claim to be, so let’s keep this relatively simple. To push further in the mountains, you’ll need to be able to tote a heavy pack for miles on end, potentially up some steep pitches, without overheating into a puddle of sweat. To connect with an animal, you need to do all that and still be steady enough to place an accurate shot at the end. The best training is doing. Load up a pack heavier than you plan on hunting with, and tote it a few miles, several times a week. If you have any elevation accessible to you, use it. The more you do, the easier it will get, the farther you’ll (eventually) be able to go, and even better, the slower your max heart rate will be. This last benefit will make it easier to calm your wobble when your pack turns into a shooting rest and hair is in the scope. If you’d like to track your progress on this front, have your gun set up for dryfire and practice as soon as you get home from your hike. Even better, if you have the room to do so, grab your gun when you get in the door and dry fire off your pack or tripod, exactly like you’d do in the field.
Another good exercise, particularly for those at lower elevations, is hill-sprints. These can increase your VO2 max, which helps your body utilize more oxygen. This will obviously help when under exertion, but has the added bonus of making you more resilient up high, where the air is thinner and oxygen harder to come by. There are plenty more exercises to get you ready for the field, of course, but these basics will go a long way toward getting you started.
Training for the Shot
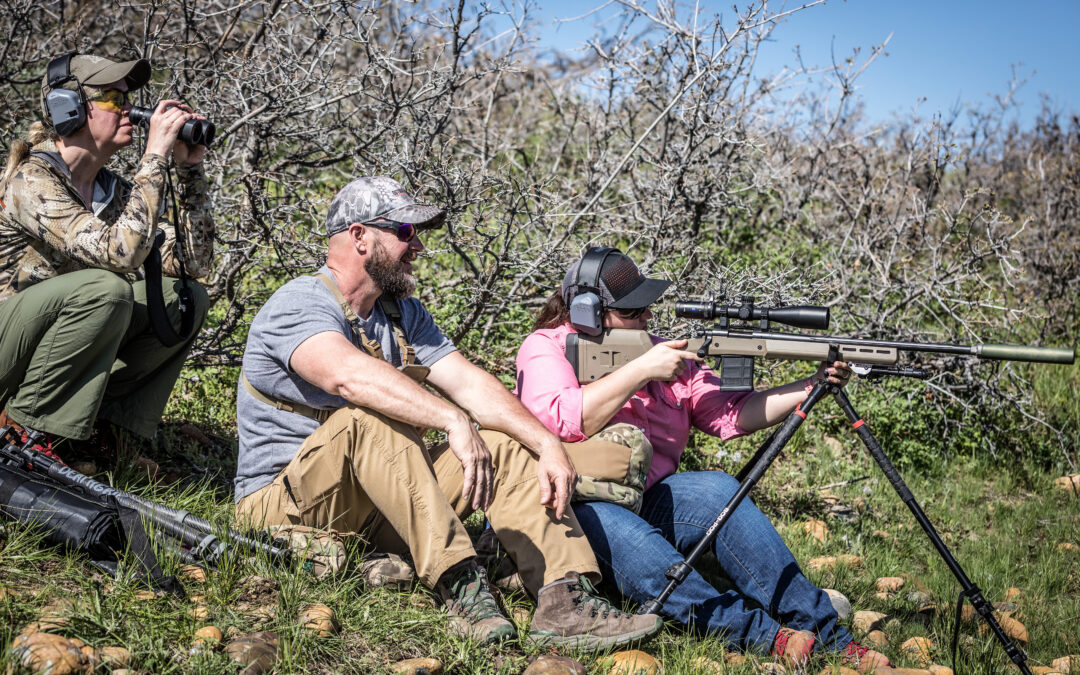
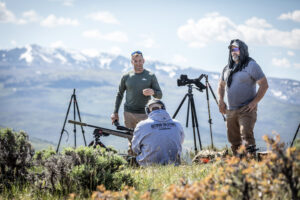
If you’ve already got fitness locked down, then what can you do to more directly prepare for the hunt? This is where true, hunt-focused hunting training comes into play. We’ve already covered the various things you can do on your own for this part of prep in a number of other articles, so today let’s discuss the benefits of a true hunter-training course like the one offered by Outdoor Solutions.
For starters, hunting training improves your hunts by presenting scenarios you may never have thought of before. More people than you’d think take to the field every year with a vague understanding that distance affects aimpoint, but no real idea how to implement this in reality, as they’ve never been off a hundred-yard flat range. Hunting training will quickly disabuse you of this notion. The effects of wind, elevation, humidity, shot angle and poor position are all also covered, as well as how to deal with them.
Once you know how to handle the factors above, you need to learn how to read them. Range and angle are easy thanks to the modern advent of the rangefinder, but what about wind, elevation, and humidity? A good hunting training course will take you through the implements you should have before you take to the field, as well as what to do if your tools fail, and you have to–for instance–read mirage to determine wind.
Training for What Comes Next
Next, hunting training will show you what to do in the seconds and hours after a shot. On a standard range, you can tell where you hit by checking the holes in the paper. In the field (particularly on longer shots) you’ll need to learn how to spot your bullet trace, and stay locked on the animal to ensure you’ve hit well. After the animal is down, a From Field to Table-style course will show you how to butcher and process the meat. This is a huge leg up before you encounter your first carcass in the wild.
Hunting Training Improves Your Future Hunts
Finally, and perhaps most importantly, a hunting training course will make you prove your proficiency at all of this. It’s one thing to dial the proper elevation and hold the right windage when someone else is calling your wind and reading your instruments, but doing it on your own is a whole different story. Being forced to apply the skills you have learned without expert assistance (though while you still have qualified instructors around to dissect your errors after the fact) makes you prove what you know to yourself–there is no better confidence boost before you hit the field. For more information on training like this, head over to outdoorsolutionscorp.com/long-range-shooting/, and fromfieldtotable.com.
If you’re looking to go afield in pursuit of game, there’s no question that using a rifle is the most efficient way to do it. The learning curve is far smoother than that of a bow, or even a muzzleloader. There are still many things to master, however, and if you’re reading this you’re likely curious where you should get started. So read on for three simple steps that will help you learn to shoot in no time.
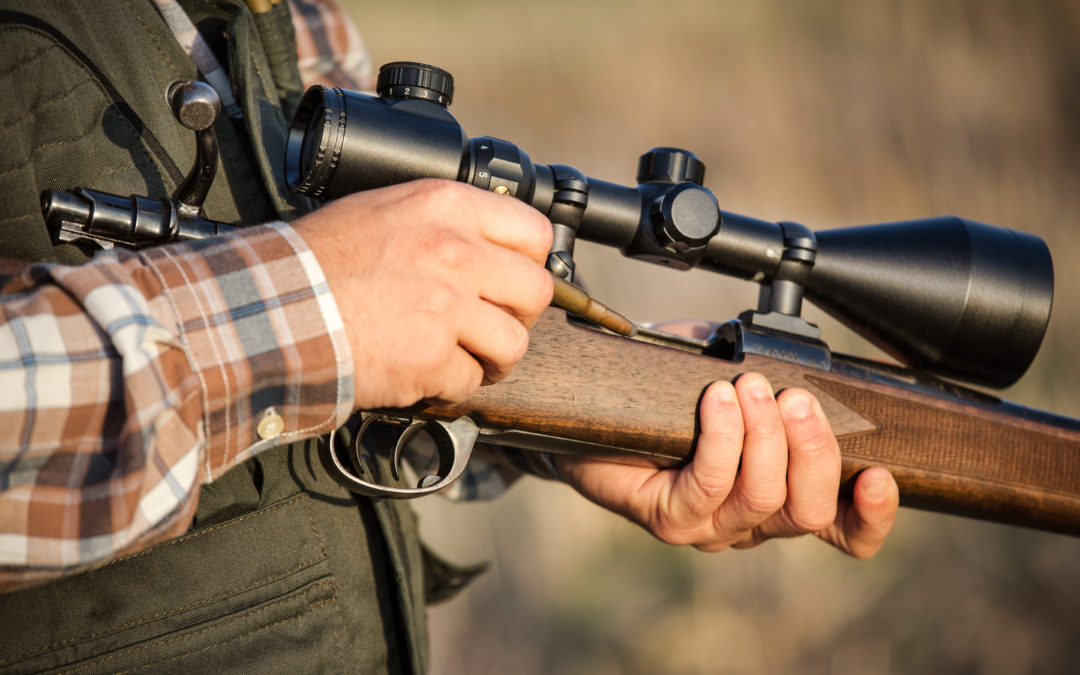
Step 1: Make Ready
There are many sorts of guns out there, but for our purposes let’s focus on the most common hunting rifle in the woods–the bolt-action. Acquire a bolt-action, have a knowledgeable friend or mentor to ensure the gun is fully unloaded, then begin to familiarize yourself with the construction. There are several different types of magazines that the gun could use, from detachable box magazines; to hinged floorplates; to tubular magazines; and even rotaries. Whichever one your particular rifle uses, learn how the cartridges go in, how they can be unloaded safely, and how they are fed into the chamber. It is best to use snap caps of the proper chambering for this, so you can see and feel exactly how the process works without ever touching live rounds.
Next, check out the controls. Your bolt-action should have a safety either on the tang (the area behind the bolt); to the right of the tang; on the bolt itself; or down on the trigger guard. See what each position of the safety does (while there are some safeties that resemble simple on/off buttons, others do have three positions), and how to quickly engage and disengage it. Look down the sights with your dominant eye–does your gun have iron sights or a scope? If the former, practice aligning the front post in the middle of the rear notch. If the latter, practice quickly finding the crosshairs. Finally, rack the bolt and give the trigger a squeeze. Feel especially for where it breaks, as this is where your shot will release. Get a sense of how to run the bolt smoothly and gently pull the trigger, then it’s time to move on to the next step.
Step 2: Aim
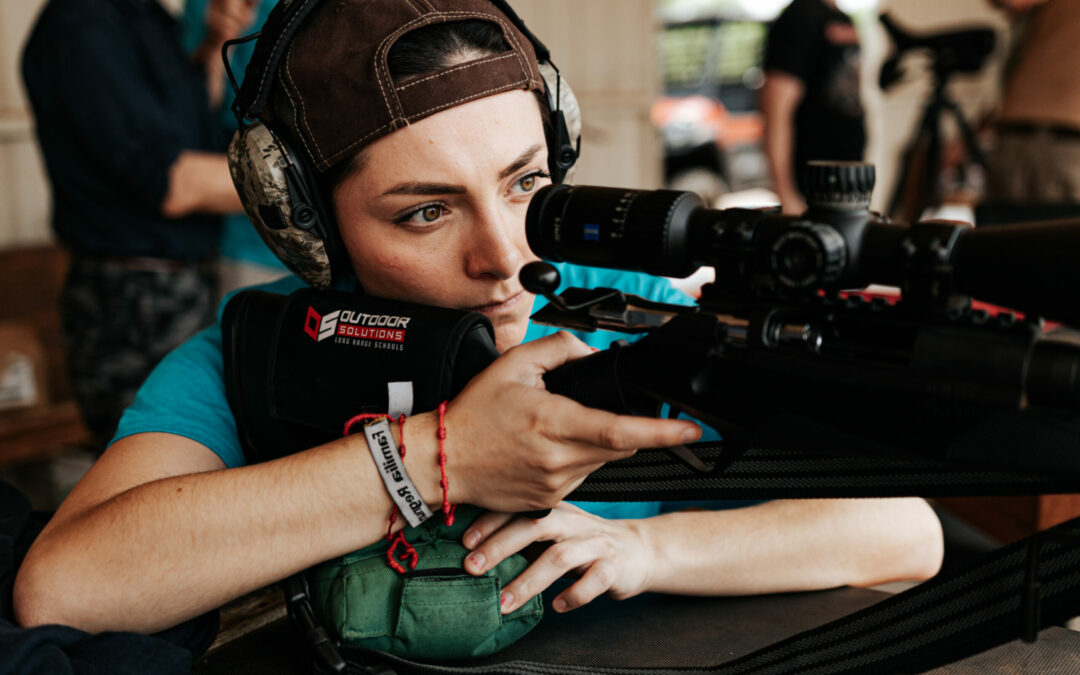
At this step, while you learn to shoot, you should be at a range. However, there should still be no live ammunition around. Nonetheless, make sure you know the NRA’s rules for firearms safety by heart before you arrive, and have ear and eye protection at the ready. Find a bench and a rest for your rifle (a front and rear bag will work fine). Put the rifle in the rest and sit down behind it. If the bench is L-shaped, don’t be tempted to sit too far to the side of your gun; instead, position the gun as closely in front of you as possible and tuck the buttstock into the pocket of your collarbone. (NOTE: this is not recommended for large-caliber magnums, as it will be uncomfortable to have it that tight to your collarbone; you shouldn’t be learning to shoot on such a gun anyway).
Get comfortable. If you are right-eye dominant, sit on the left side of the rifle. Your right eye should be looking down your sights, with your right hand on the trigger. If you’re left-eye dominant, you should be on the other side of the rifle, with your left hand on the trigger. Align your sights with the target, and make sure you’re using as little muscle to keep your head in position as possible.
Also ensure your rifle is sitting almost fully supported by the bags, rather than your arms. Your trigger hand should be on the grip of the rifle, thumb riding on the same side as the rest of your hand, rather than wrapped around. Your support arm should be curled under, hand on the rear bag. Now practice your shot.
Rack the bolt with whichever hand is on the bolt-handle side (generally this will be the trigger hand, but if you’re left-eye dominant shooting a standard right-handed rifle, it will be your support hand. While harder to come by, it would eventually be worth looking into a left-handed rifle if you’re left-eye dominant). Click the safety on. Take it off. Gently squeeze the trigger. Did the sights move off the target when the trigger broke? If so, your squeeze is too abrupt; try again. After you’re comfortable putting the gun on safety, switching it to fire and breaking a shot, grab your snap caps. Practice loading the rifle while keeping the muzzle safely downrange, then positioning for a shot, taking the safety off and firing through a “full” magazine. When your last snap cap is ejected, leave the bolt open so everyone knows the gun is empty, then either run the drill again (this is called “dry-firing”) or move onto the next step.
Step 3: Fire
Eventually, of course, in order to learn to shoot a gun, you have to actually send some lead downrange. While this entire process would be better accomplished under the gaze of an experienced mentor, I must reiterate specifically for this section: if you can find someone to watch and give you pointers in real time, that is far and away the best option.
With the bolt open and the muzzle downrange, load your ammunition into your rifle, double-checking to make sure it’s the right cartridge for your firearm. Once loaded, close the bolt (ensuring the cartridge feeds properly into the chamber) and flick the safety on. Get behind the rifle exactly as you did when dry firing, and when your sights hover over the target, flick the safety off. Take several deep breaths. On an out-breath, squeeze the trigger until the shot is released.
Once the shot is away, flick the safety back on. Was the recoil too painful? If so, move the gun a little away from your collarbone and toward the shoulder. If not, keep it where it’s at. Also practice keeping both eyes open all the way through the shot while you learn to shoot (this will take some practice, as we naturally blink during recoil). Now take the safety back off, rack the bolt and try again. While you still have quite a ways to go to achieve true marksmanship, congratulations! You now know how to shoot a gun.
There are few feelings worse than missing a target. Missing an animal, however, is one of those few. There’s something about watching dirt fly as an animal charges off into the underbrush that punching the wrong hole in paper simply can’t recreate. Part of it is fear and embarrassment–a shot gone awry could just as easily have been a shot in the guts, potentially leading to a mortally wounded, yet unrecoverable, animal. The other part is a yearning to avoid this situation ever again, without the knowledge to really fix your issue. If you had that knowledge, of course, you’d already have done so. If you recognize this feeling (and let’s be honest, most everyone who’s taken to the field knows it well), read on for a few tips on how to improve your shooting accuracy from any distance.
Positions are Paramount
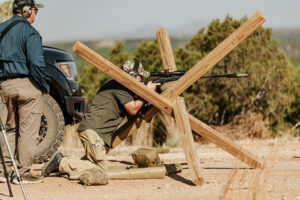
Compared to hitting a target at 400 yards standing, shooting 1000 yards off a bench is easy. Don’t believe it? Try both sometime. A whole lot of what long-range shooters specialize in is benchrest shooting, which is–of course–logical. With the exception of PRS matches, long-range competitions occur in exactly such a setting, as it’s the most conducive to pinpoint accuracy. As hunters, however, we are not so lucky. Shots can occur off bags, off tripods, kneeling, sitting, or even offhand. As a result, it’s our job to know exactly what our effective range is in any of these positions.
But how do we improve our positional shooting accuracy? First, remember the more that’s supported with structure instead of muscle, the better (by structure, we mean tripods, bipods, bags or your bones, with joints locked out). The more muscle you add in, the more wobble you’ll see, and the more fatigue will affect your shots. Try placing your hunting pack under your hips if sitting, under the butt of the rifle if kneeling, etc. You’ll be surprised at the difference you see, at any range.
Dry Fire Daily
Shooting positionally is all well and good, but what if you can’t make it to the range as often as you’d like, or you’re not lucky enough to have access to a range that will let you play around with how you shoot? The answer is right inside your house. Get a snap cap that matches the caliber of your hunting gun, and dry-fire, dry-fire, dry-fire. By this, I don’t simply mean get behind the rifle and only practice your trigger pull. For this training, focus on your site picture.
Take a small piece of masking tape and place it on your wall (you can also use a small picture of a game animal if you want to get really fancy–it will give you a far better idea of what your wobble looks like over vitals–but it’s not necessary). See how much your crosshairs wobble over the masking tape. More importantly, see what you can do to decrease this movement. Try different pack placements if seated or kneeling off a rest. If standing off a tripod, try locking out your knees and support elbow. When you’ve figured out where you’re most stable in every position, make a note of how you do it, then practice each one until it’s second nature. Want to make it harder? Find a smaller picture, or use a smaller piece of tape.
Rimfire Relentlessly
We touched on this in a previous article, but it bears more fleshing out. If you’re looking to improve your shooting accuracy at any distance, but lack the sort of range needed to do so, look into acquiring a quality .22 Long Rifle and topping it with a scope you can dial. Ammunition is cheap and (generally) plentiful, but more importantly, it turns even a 300-yard shot into a very daunting proposition.
There are, of course, limitations to this. Elevation adjustments will not be the same as on your centerfire rifle, nor will wind holds. You’ll still need to find a time and a place to figure these out (in conjunction with an app like Hornady 4DOF). Recoil control will also not be the same, as a .22 likely doesn’t kick anywhere near as badly as your big-game gun.
What it will do is get you used to ranging and dialing targets, and sometimes guesstimating your exact adjustment if the range is between those written on your DOPE card (yes, if possible you should always put your range into your app and use the exact adjustment it spits out, but batteries die, and sometimes that’s just not realistic–keep a physical DOPE card handy). It will also make you extremely proficient at estimating wind speed–.22s blow around about as badly as a bullet can. While wind holds may not translate between platforms, gauging wind speed sure does.
Flinch Factor
This drill is a carry-over from self-defense drills, but it works just as well for hunters. If you’re having trouble maintaining shooting accuracy even when in a stable position, chances are you’re flinching. Odds of this are even greater if you’re shooting the latest, greatest, hardest-charging elephant gun on the market. Fortunately, there’s an easy way to tell and to train the reaction out of yourself, but it does require a partner.
Acquire some snap caps for your caliber rifle, then find a buddy to hit the range with. Once there, have him load your rifle for you, sprinkling in snap caps randomly. No peeking! If you’re flinching a shot, you’ll find out the first time the gun goes “click” instead of “bang” and your sights jump halfway to Texas. While it may seem like you could accomplish the same thing while dry firing, you can’t. The flinch is triggered by the impact your brain thinks is coming, so you really do have to trick it this way. Dry fire can help you train that flinch out of your psyche, however, in conjunction with a whole lot of these drills.
These are four good tips for improving shooting accuracy, but they’re just the tip of the iceberg. For more, check out the archive of knowledge at outdoorsolutions.com.
Learning to shoot at long range is all the rage lately, but it can be a daunting discipline to approach. What sort of gear do you need? Where can you shoot at such incredible distances? How do different environmental conditions affect your ability to shoot? When it comes to long range shooting for beginners, there is much to be learned to be sure, but it’s no use trying to absorb it all at once. As such, read on for some tips on how to get started with long range shooting.
Tip 1: You’re Only as Good as Your Tools
Everyone in the industry seems to be selling hardware these days. The latest optic, or bullet, or rifle is apparently all the average-Joe needs to become a scout sniper. Obviously, this is a bit of an exaggeration, but the truth does lie somewhere in the middle. While you don’t necessarily need a $10k setup to shoot 1000 yards, you won’t be doing yourself any favors trying it with a duplex 3-9x40mm on top of your granddaddy’s deer rifle. As such, before you even hit the range, make sure you’ve got a rifle capable of MOA accuracy (or better), and a riflescope capable of dialing for elevation. Also ensure you have a chronograph, or some other method for measuring the speed of your projectiles, and a rangefinder. These will become important later.
Tip 2: .22 For The Wind
If you’re not capable of procuring the above, don’t despair yet. Get a decent .22 rifle and top it with the sort of riflescope just described. Shooting out to 300 yards with a .22 is a great analogue for shooting legitimate long range, and can help build many of the same skills you’ll need to do it for real. Wind calls in particular are tricky with the light little projectiles, and you can get very proficient at gauging exactly how hard the breezes are blowing.
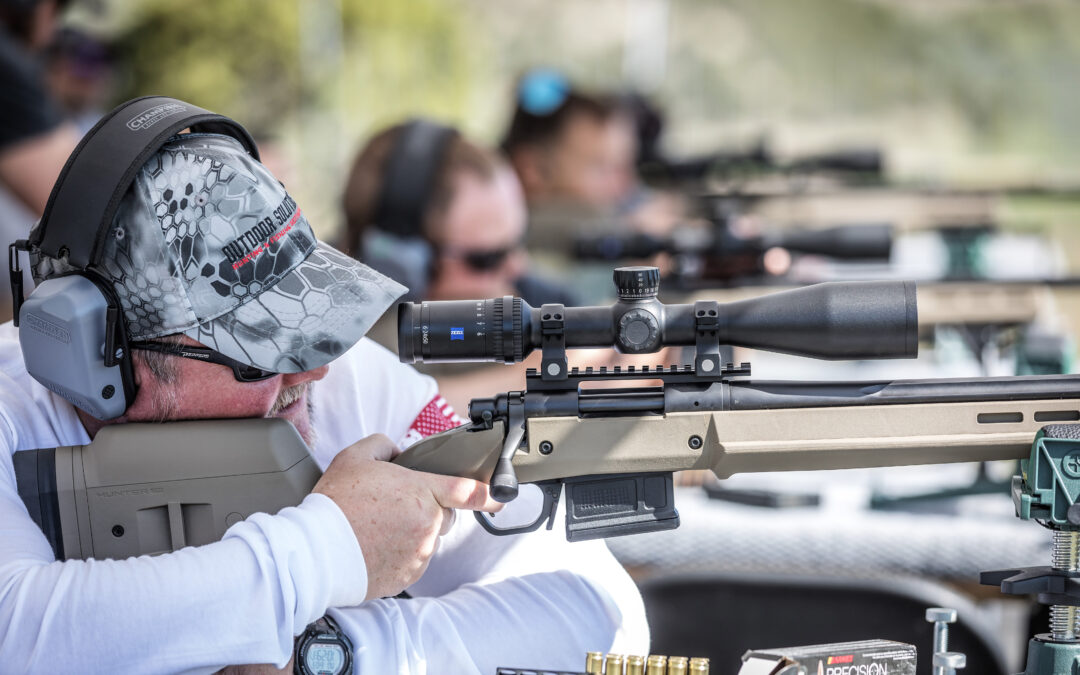
Tip 3: Stabilize It
There are plenty of myths out there about how easy it is for some folks to shoot long range. Many get the idea they can start out shooting off a tripod, bipod, or even standing. While you will work up to these in time (that final category will always remain much more limited than the others), nothing beats the good, solid rest provided by front and rear bags–either off a bench or from the prone position. Particularly while you’re still learning elevations and wind holds, it’s best to take all other potential influences out of the equation. Once you can hit any distance, any time off bags, you can move on to the next step.
Tip 4: Don’t be Scared of Data
When first encountering the world of long-range shooting, people can be turned off by the sheer amount of calculation, measurement and mathematics involved. Unfortunately, the quickest and easiest way to improve your skills is to utilize all these modern wonders, rather than simply slinging lead until you get a hit and recording how you did it.
For starters, download a ballistic calculation app like GeoBallistics, and put in as much information about your rifle, ammunition, and environment as you possibly can. Next, chronograph your rifle’s muzzle velocity (an average of at least five works best), then input that into your app–while muzzle velocity is generally recorded on the ammo box nowadays, having an exact measurement of how it performs in your own rifle is more desirable. Finally, range your target, input that into the app, and use the elevation calculation it gives you (you’ll want to decide up front if you’re going to learn/use MOA or MRADs, to save on confusion down the road). This should get you close-to or even right-on target, and you can make adjustments from there. Once you’re hitting consistently, note how far you had to dial before moving on to the next range.
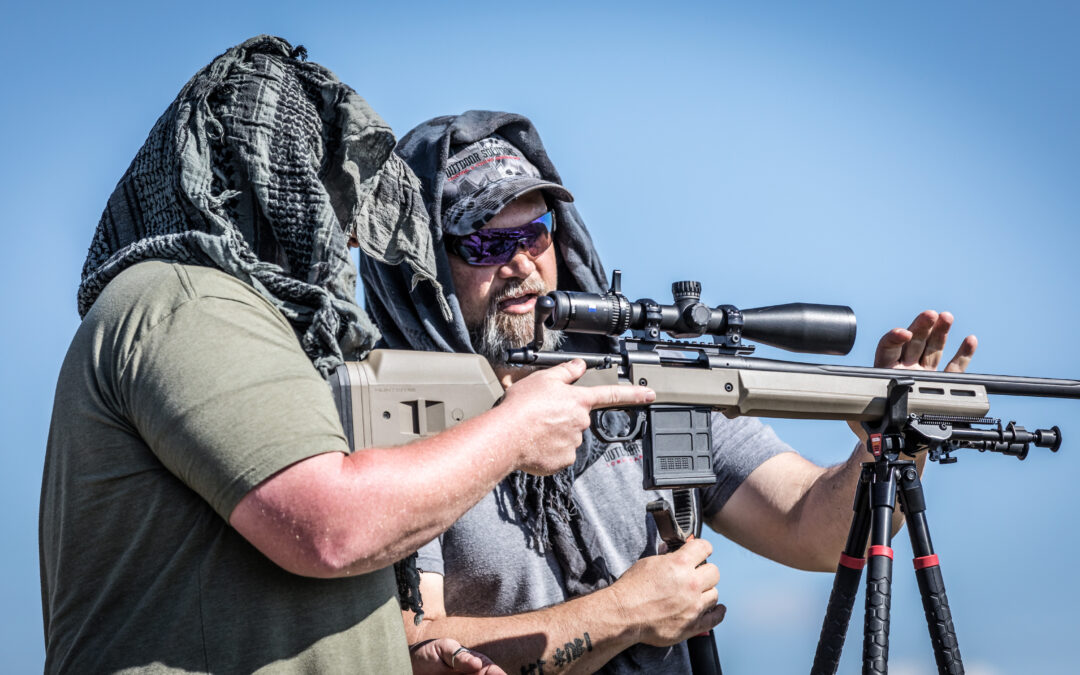
Tip 5: Take a Class
As always, there really is no replacement for expert instruction. Learning from folks who know what they’re doing will put you lightyears ahead of figuring it out on your own, and can be extremely helpful when you have specific, potentially esoteric questions that only a human can answer, as opposed to a search engine. An investment in building your skills will almost always yield a better return than investing in equipment, so while you may balk at the price tag, compare it to how much you have or will spend on rifles, quality ammo, quality glass, etc. Once you’ve decided to make that jump, check out Outdoor Solutions long range schools. We have everything needed to take you from neophyte to knowledgeable in a hurry, and show you a good time while you’re doing it.
Hunting is a fickle pastime and the very definition of type 2 fun. Unlike planning a trip to Six Flags or a weekend at the shore, the only guaranteed joy of a hunt is the pursuit itself. Game animals have minds of their own, and particularly if you’re out after a trophy, there is always a chance your quarry will not cooperate. Deer do sometimes sleep in, bed down early, or even leave areas entirely for no perceptible reason. All that said, however, there are some things you can do to up your chances of success. Read on for three of the best hunting tips.
1. Know Your Ground
Of prime importance is knowing the area and animals you plan on hunting. Instead of spending your whole summer wetting lines and skipping stones at the nearby watering hole, get out there and burn some boot leather in the backcountry. Find bedding sites, feeding areas, and migration corridors to start, and the closer you get to fall, look for any specimens you can find stomping around in velvet. Will much of this pattern change when the rut sets in? Of course. Does that mean scouting is useless? Of course not! Having a general idea about deer activity is far superior to none at all.
As a corollary to this, if you’re hunting out of state and cannot spare the time necessary to properly scout your hunting area beforehand, there is absolutely nothing wrong with hiring a local guide. Many will hem and haw about the purity of DIY hunting, and they are correct, in a sense. There is nothing quite so rewarding as doing the entire process yourself. What they fail to recognize, however, is that knowing your ground is an integral part of the process. If you skip it, you should really hire someone who hasn’t, otherwise, you’re simply blundering around the woods with a gun, looking for a sign. If you choose to ignore this advice, or simply cannot afford to take it (let’s be honest here, guides are not cheap) at the very least use an app like onX to digitally “pre-scout” your location, to find promising locales. This will greatly up your odds of happening upon a game-rich area.
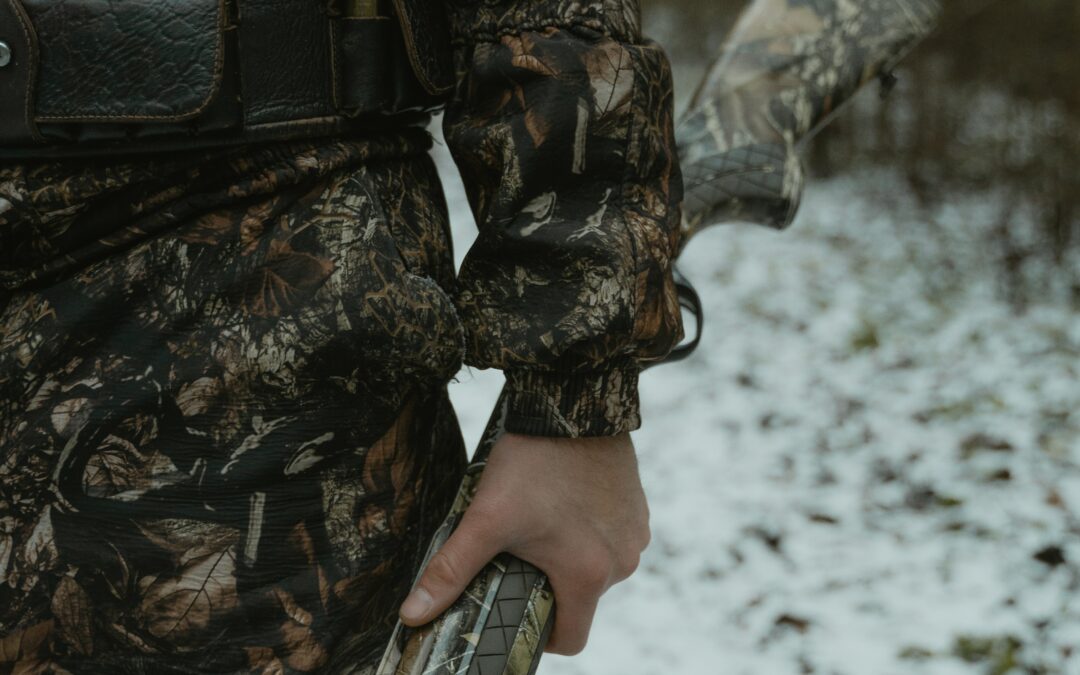
2. Know Your Gun (or Bow)
The internet is aflame these days with admonitions to not simply buy a gun, but to train with it too. Thing is, that advice is in vogue because it’s dead-on accurate–there is not much more important than having an intimate knowledge of the weapon you’re carrying. As hunters, however, we need to take this advice a step further.
Benchresters shoot from benches, concealed-carry practitioners fire from a draw, and bullseye competitors shoot bladed, but hunters shoot from … well, just about everywhere. Can you hit out to 1000 yards off a bench? Great. But can you hit 400 yards standing? How about 600 seated, or off your knees? These are the kind of shots you’re going to have to make out there, all the while taking into account the effects of wind, elevation, and the invisible timer that buzzes as soon as your target buck disappears behind a tree. If you can’t make these shots on a flat range, I guarantee you have no chance of doing so in the field, so make sure to not just train your wind holds and trigger squeeze, but your different shooting positions too.
Find out how to get the most stability in every position (it will generally be when you have the majority of your weight supported by bones, bags, and bi/tripod legs, rather than muscles), and practice dropping into these positions in a hurry. The best part? You can do this in your basement as a dry-fire drill. Disclaimer: Be sure to check that your chamber is empty before doing so. Put a small thumbtack in the wall as an aiming point, and see how quickly you can stabilize enough to execute a comfortable “shot” on that target. You’ll thank me when a distant deer’s vitals are in your reticle.
3. Know Yourself
Okay, I know that subhead is a little out of left field, but I wanted to keep to my theme and it sounded cool, so hear me out. When I say know yourself, what I mean specifically is to know your own mind. Why are you out there? What are your motivations for hunting? How far do you plan on pushing it to find success? As with everything worth doing, hunting contains a vast mental aspect that most people overlook. Ever notice how much heavier that trigger seems when you’re on an animal, as opposed to when you’re banging steel at the range? I guarantee your trigger didn’t just happen to gain 5 pounds overnight (unlike myself coming back from the Golden Corral). What’s changed is your situation: your brain knows that’s a target you likely only have one clean shot at, and it is petrified of missing. This could be due to the shame seemingly imparted by a miss, the fear of wounding and losing the animal, or a myriad of other factors personal to that particular hunter.
If you know what I’m talking about, I have news for you. We all miss. I’ve missed, you’ve missed, your dad missed, even your dead-eye grandpa missed (though he might never have admitted it, we both know that jackalope got away back in ‘48). Instead of getting caught up in the emotion of the shot and the possibility of a poor outcome, analyze it logically. Are your crosshairs wandering outside of the vitals? If so, don’t pull the trigger, that’s a poor shot. If they aren’t, for God’s sake don’t try to squeeze every last inch of wobble out by flexing, and definitely don’t attempt to time your shot for the moment the sights rest over the top of the middle of the center of the deer’s main aortic valve–you’ll jerk the trigger and send your shot into orbit. If you’re confident in your wind hold and elevation, and your sight picture is solid enough, there’s nothing more to think about. Squeeze that trigger, and worry about where your impact is after the bullet has left the barrel.
While I think this is its most important aspect, the mental game goes much further. There is no such thing as too cold, too far, or too wet if you’ve got the right equipment, paired with the right mindset. On the other hand, you could be decked out in the best gear imaginable, but you’ll turn around at the first sign of adversity if that adversity is what you choose to focus on. Get your mind right before you hit the field, you won’t regret it.