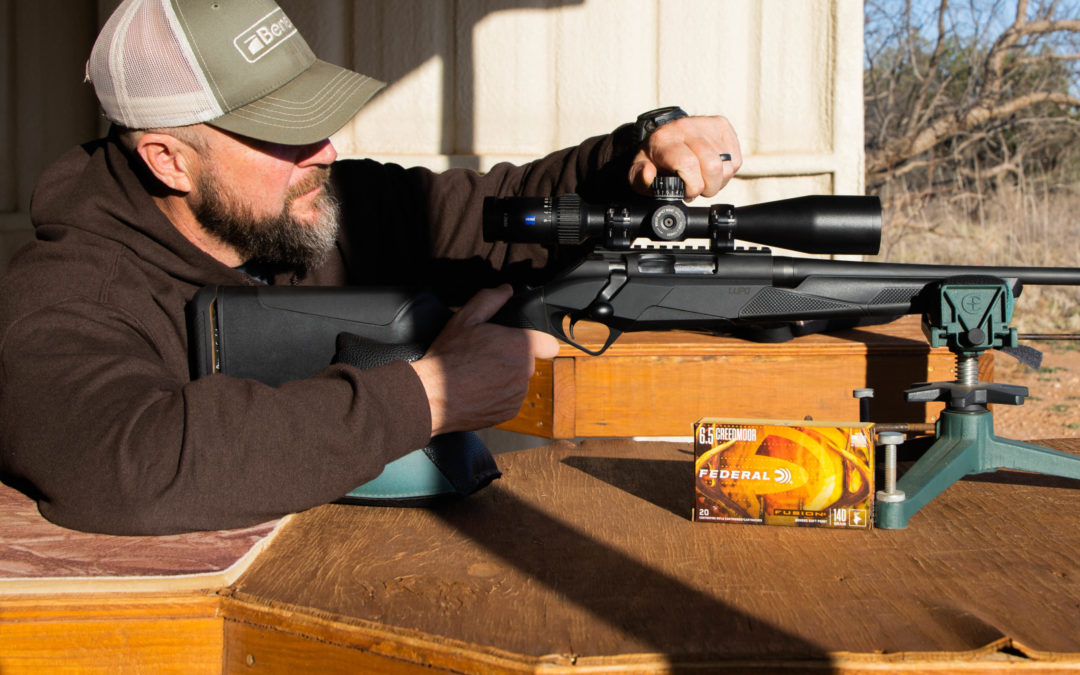
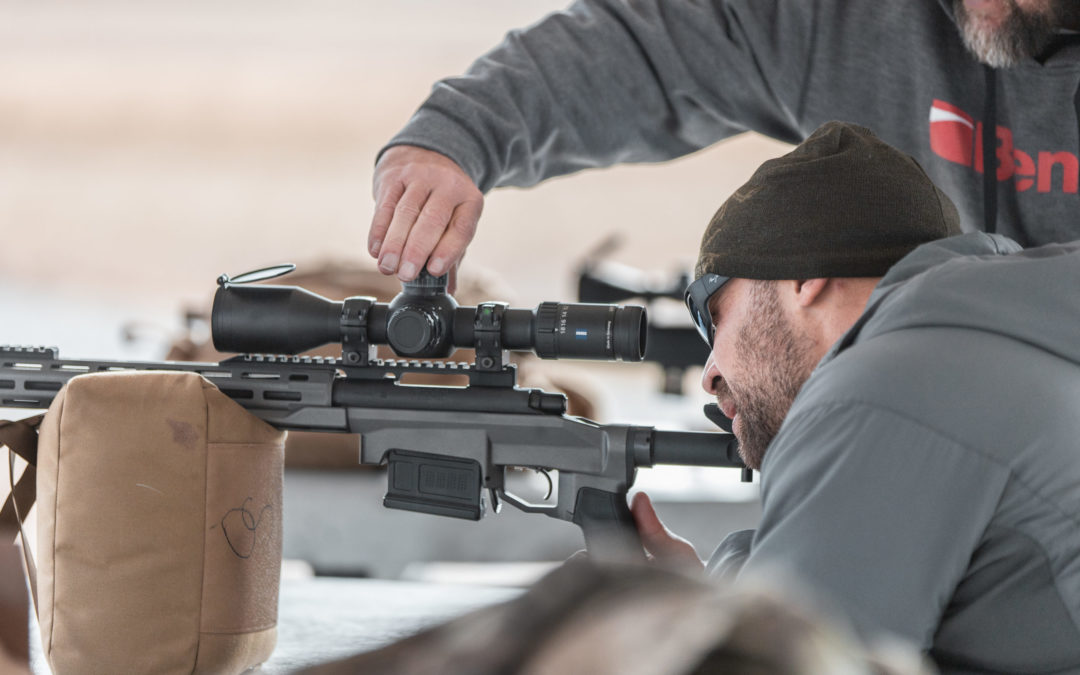
Students at Outdoor Solutions’ long-range shooting class use Benelli Lupos in 6.5 Creedmoor topped with Zeiss glass. Brian McCombie
During the two-plus days I spent at the class, a fair amount of my attention was focused on answering the question: How effective would the Lupo be for taking deer and other big-game animals out to 400 yards?
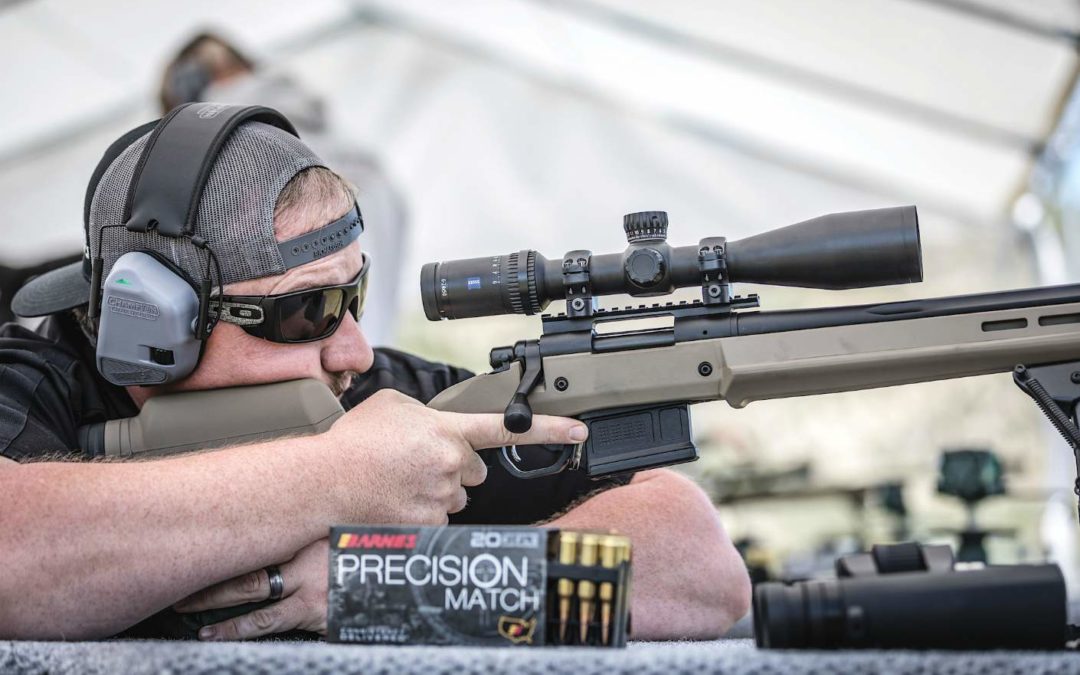
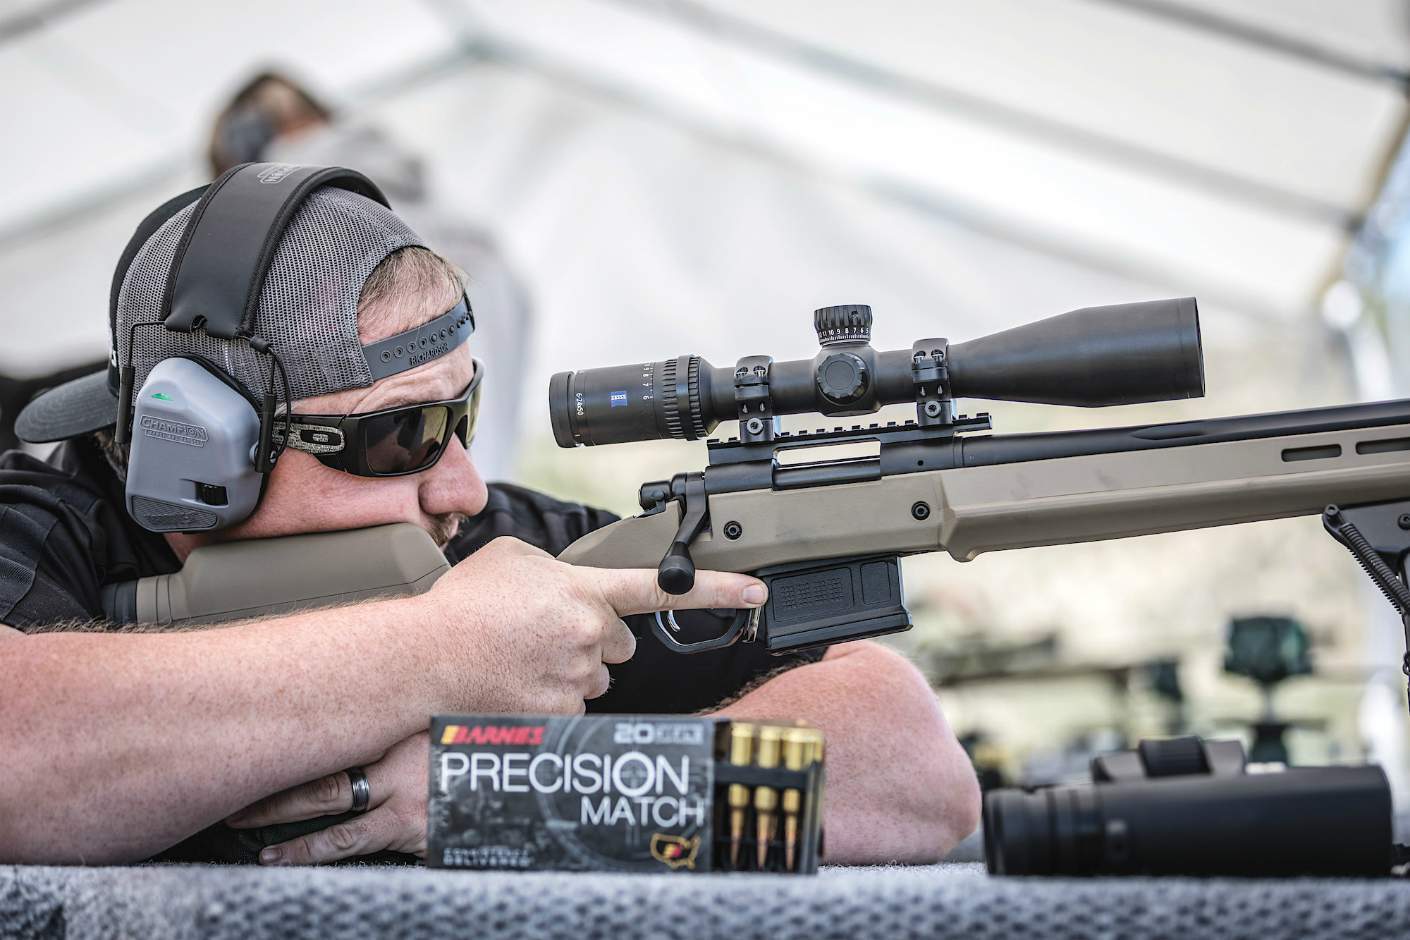
During the second day of the shooting course, the students used the Benelli Lupo in practical field scenarios. Brian McCombie
Benelli Lupo to 400 Yards
The bolt-action, magazine-fed Lupo, I concluded, was quite capable of making first-shot, one-shot kills to 400-plus yards on big game. It was very accurate, the bolt-action locked up solidly, and the five-round magazine tucked up into the receiver nicely and out of the way. The Lupo is also threaded for a suppressor, and Benelli’s Progressive Comfort System built into the stock effectively reduces recoil.
One caveat, though: Benelli placed the Lupo’s trigger system in the stock’s wrist at a strange angle. In some shooting positions, that angle required me to twist my hand and wrist in a way that made it difficult to shoot, especially when firing from a level platform like a shooting bench. Not that much hunting is done off a bench. Still, it will take a hunter some practice and adjustment to get used to that different trigger angle and trigger-guard placement.
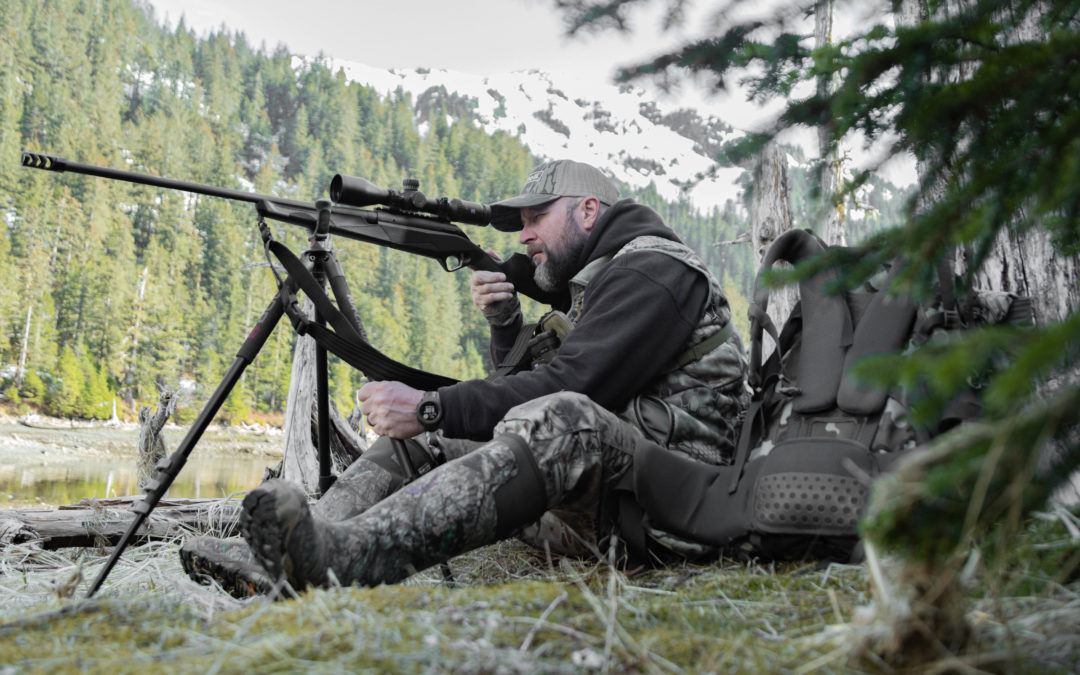
One of the students in the class puts the Benelli Lupo to work on a downhill shot off sticks. Brian McCombie
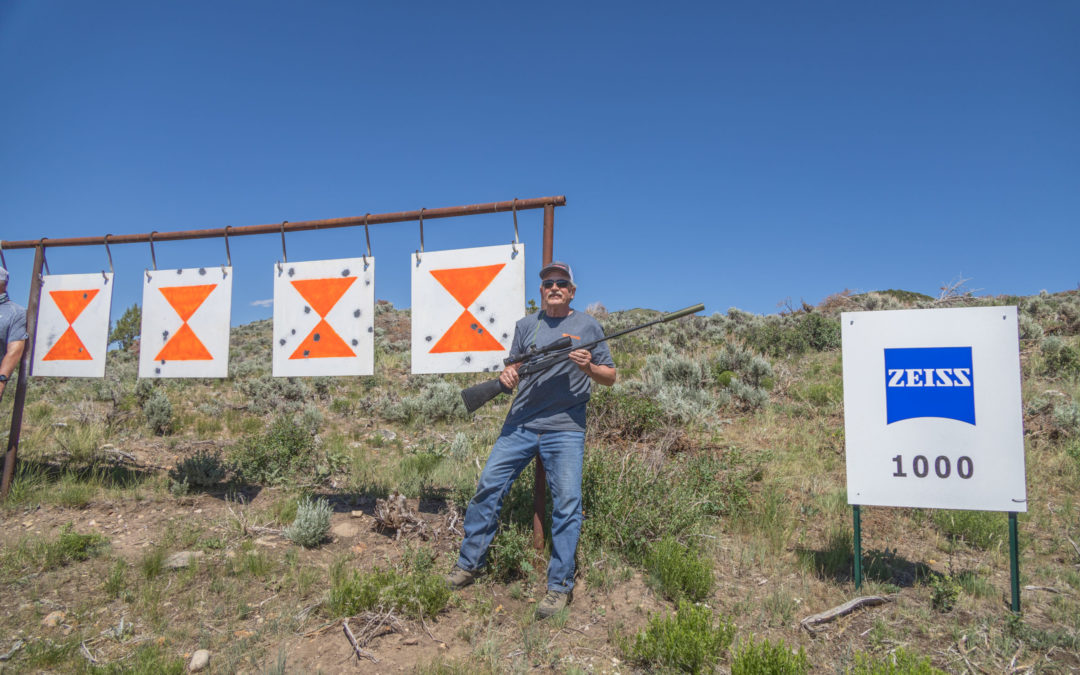
Taking the Benelli Lupo to 1,000 Yards
The class was held near Coalville, Utah, this past June, and was attended by 15 people, including myself. Three instructors, all with impressive military and civilian shooting credentials, took us through two days of intensive shooting, starting with 3 MOA steel targets ranging out to 1,000 yards. https://8daa68bf4c1bf6391da2e109e3f52182.safeframe.googlesyndication.com/safeframe/1-0-38/html/container.html
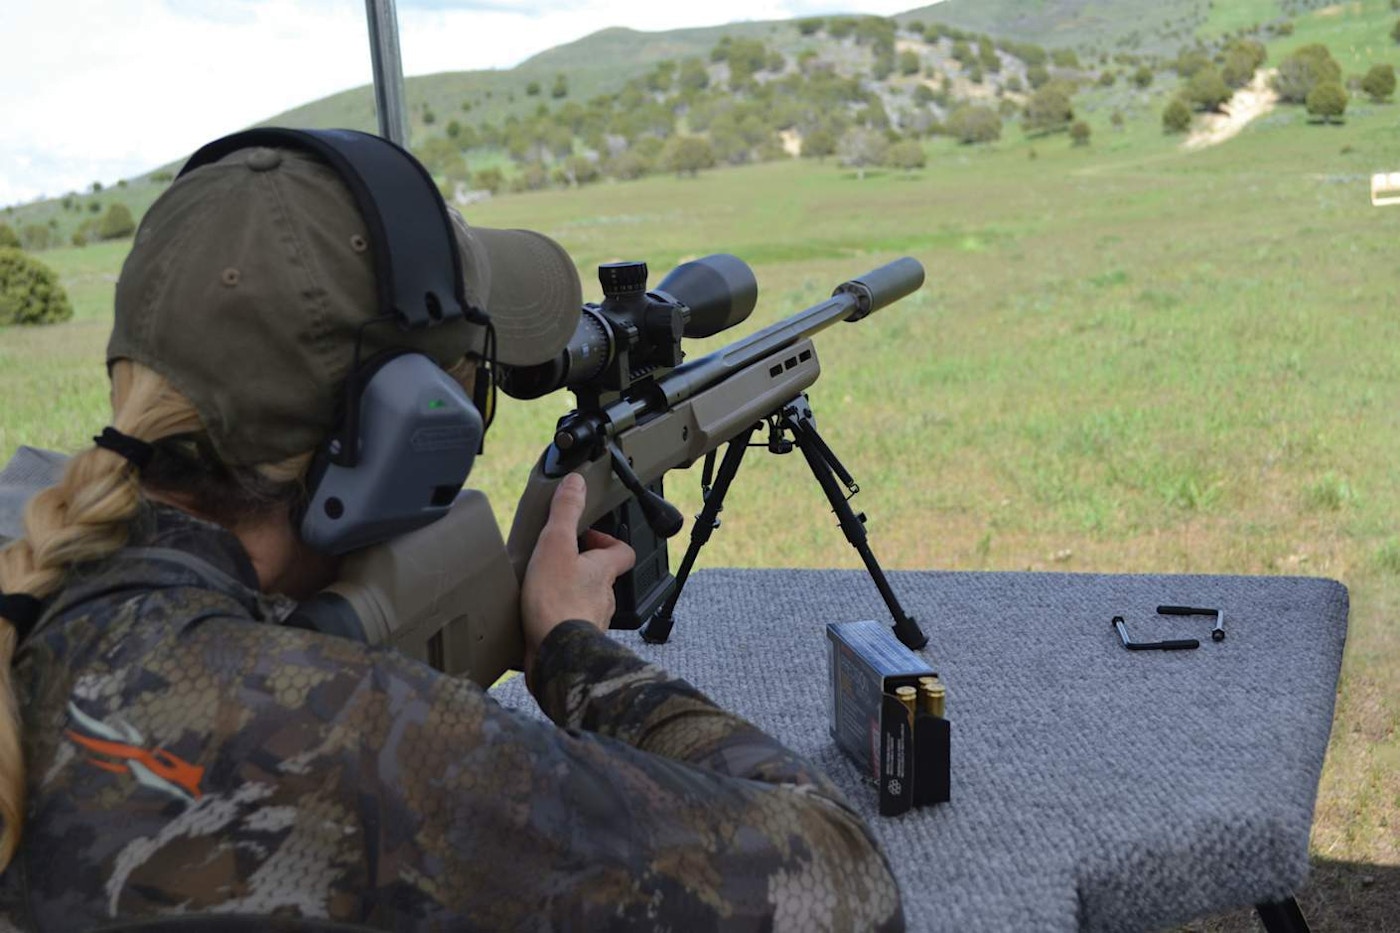
Then, on the second day, we traveled up into the nearby mountains and shot from positions we might encounter while hunting, like off large rocks and tree stumps, from shooting sticks, and lying prone on rocky hill tops.
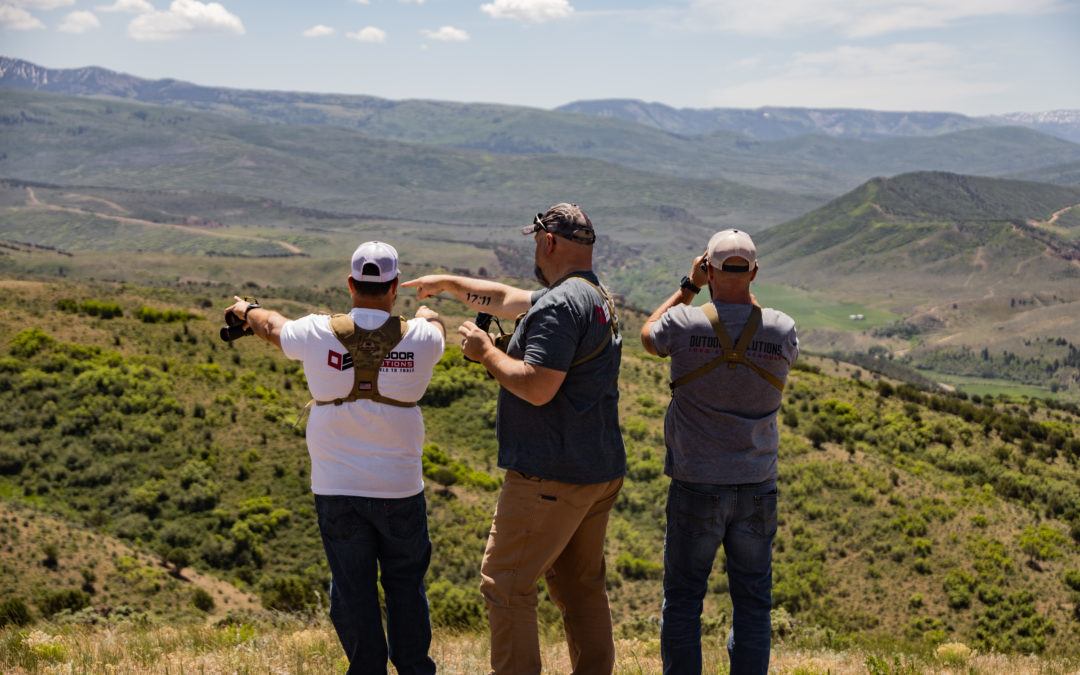
Obviously, the course was designed to make us better long-range shooters. But the purpose of that was for us to find out just how far we could ethically take a shot at a big game animal. Most of the participants I talked with hadn’t shot a game animal at much over 125 yards, and they wanted to gain the skill and knowledge to know how and when to take a shot at 300 yards or more.
Benelli Lupo Rigged Up
Each shooter was provided with a Benelli Lupo chambered in 6.5 Creedmoor and topped with a Zeiss Conquest V4 6-24×50 rifle scope. We shot suppressed, the rifles tipped with AAC Jaeger 30s. Barnes Precision Match in 6.5 Creedmoor ammunition firing a 140-grain boat tail bullet rounded out or rigs.https://8daa68bf4c1bf6391da2e109e3f52182.safeframe.googlesyndication.com/safeframe/1-0-38/html/container.html
We zeroed our rifles on paper at 100 yards, then shot more paper at 200 yards, taking turns shooting and spotting with a partner. Then we stretched to 3 MOA steel targets at 300 yards, and more steel at every 100-yard interval out to 1,000 yards.
Our day-two shooting was really a much better test of the Lupo as a longer-range hunter and the rifle did really well. My first shot hits included:
Within six inches of the target’s middle, at 650 yards shooting off a log with my backpack under my chest, and a wind of 10 mph wind moving right to left
Dead center twice in a row, prone at 480 yards, pack under my chest and small range bag under my shooting elbow, with the target posted upslope from me
Two out of three shots easily within an area equal to an elk’s vital area at 610 yards, rifle resting on top of a short, scrubby tree, with me holding off 2.5 MOA to the right to compensate for wind
And, 710 yards, my butt on the ground and rifle on short shooting sticks, two shots in a row, and my spotter put them a half foot apart and straddling the center bullseye.
A longer-range hunter? With that kind of accuracy, the answer should be, “Hell, yes!” And yet…
The author found the positioning of the Benelli Lupo’s trigger awkward, especially when shooting off the bench. Brian McCombie
Ergonomic Issue
Those dead-on shots from positions much less stable than day one’s shooting table got me asking myself: How come I’m drilling damn near everything when shooting off logs and brush, first shot in all but one case, yet I had so much trouble the day before hitting a bullseye at a measly 100 yards?
Which is when I began paying attention to my trigger hand’s placement on these day-two shots and realized all my shooting was being done uphill or downhill. And with the rifle tilted at these angles, my hand and wrist were fairly comfortable.
I also remembered that during day one my accuracy improved as the shooting stretched out to 500 to 1,000 yards. At the time, I assumed I was getting used to the rifle as the day wore on and so my accuracy improved. But it occurred to me that maybe the improved shooting was because those targets were placed up slope from my shooting table and I had to place the Lupo at a definite angle to make those shots.https://8daa68bf4c1bf6391da2e109e3f52182.safeframe.googlesyndication.com/safeframe/1-0-38/html/container.html
The 100- and 200-yard targets I had so much trouble with were essentially straight ahead and level with me and the shooting bench. At that position, my hand was forced back and this twisted my wrist at an awkward angle relative to my forearm and shoulder; getting stable with my hand and wrist in this position was very hard.
The Lupo’s trigger system looks a lot like that found on Benelli’s Super Vinci, but the Lupo’s is pushed up and back into the stock’s wrist or grip at an even more extreme angle.
Flawless Functioning
The trigger itself snapped off a very crisp 2 pounds 4 ounces according to my Lyman Digital Trigger Pull Gauge. The bolt worked easily and smoothly, even with the dust and dirt blown into the action during two windy days in a very dry Utah landscape. Recoil in this caliber was minimal.
But the design of the trigger placement, in my shooter’s opinion, is off. I hope Benelli can adjust that in future models, maybe a Lupo II? That’s a rifle I’d gladly take on a hunt where I could expect a shot on a deer or elk of 400-plus yards.
Looking to stretch out your effective shooting range? Here’s how.
By Hilary Dyer
September 01, 2020
Sign Me Up!
Join other outdoor enthusiasts who already get great content delivered right to their inbox. Sign up Digital!
If you’d like to extend your shooting range even a little, learning to shoot 1,000 yards at the shooting range is a great idea. (Photo: Hilary Dyer)
Don’t worry — this isn’t going to be an article that preaches to you about how long range hunting game is unethical. It also isn’t going to be an article that encourages you to take shots beyond either your capabilities or the bounds of ethics.
The bottom line of hunting at any range is that each hunter needs to do some self-reflection and be honest with themselves about their equipment, their skill and their environment, and determine the distances at which they can deliver a clean, precise shot. If you’ve determined your maximum distance already and you’re comfortable with it — great. But if you’d like to be able to stretch out a little farther, it’s time to start flexing those long-range muscles at the shooting range first.
First, what is “long-range hunting” exactly? Most of the coyotes hunted in North America are shot inside of 120 yards. In places like the North Woods and the thick hardwood forests of the Northeast, even seeing 100 yards through the trees might be an impossibility, and most predators are shot at much closer distances, often as spur-of-the-moment shots while the hunter is pursuing something else (usually deer). But in the green fields of the South, the vast openness of the prairie or the wide-open spaces of the West, it’s not at all uncommon to be able to spot coyotes 300, 500 or 1,000 yards out.
Now, I’m certainly not going to tell you to shoot any game animal at 1,000 yards, for reasons I’m about to highlight. But if you’d like to extend your shooting range even a little, learning to shoot 1,000 yards at the shooting range is a great idea.
“If you can successfully shoot targets at 1,000 yards, the confidence to make a 400-yard shot on an animal is there,” says Erik Lund, lead instructor at Outdoor Solutions Long-Range School. “The skill and the technique and the knowledge we try to communicate, that breeds confidence in your abilities and hopefully allows you to expand your range where you comfortably feel safe or ethical engaging the target.”Related: Summer Predator Gear You Can’t Miss
So how do you get to 1,000 yards at the range? Quality optics, from binocular to riflescope and rangefinder, makes a difference with long-distance shooting.
The Math and Equipment
First, long range hunting is all about math. Fortunately for those of us who have forgotten every bit of high school trigonometry, a variety of ballistics apps are available on your smartphone that will do all the math for you. Ballistic math is calculated in either milliradians (mils) or minutes of angle (MOA). Because MOA tends to work with the American measurement system a little better, we’ll use MOA in this article. Your rifle probably came with a “1 MOA guarantee” or something similar. What does that mean? One MOA is equal to 1.047 inches at 100 yards. A rifle with a 1 MOA guarantee should be able to put every shot within a 1-inch circle at 100 yards — assuming accurate ammo and a shooter who does their part correctly. One MOA at 200 yards is 2.094 inches; one MOA at 300 yards is 3.141 inches, and so on.
If you’re going to shoot at 1,000 yards and your rifle is capable of 1 MOA accuracy, it should put every shot within a 10.47-inch circle. Incidentally, that’s a good bit larger bigger than the kill zone on a coyote, not to mention a fox or a bobcat. For this reason alone, you’re wise to seek a gun that shoots better than 1 MOA for long-range use. A gun that’s capable of ½-MOA accuracy should put its rounds inside a 5-inch circle at 1,000 yards, again, assuming ideal conditions.
Once you have a rifle that can shoot at least 1 MOA, you need a scope intended for long-range shooting. That means its elevation turret will have fine adjustments (.25-MOA adjustments are typical), and its reticle will have horizontal hash marks (some shooters prefer vertical as well) that you can use to measure MOAs. Your scope also needs the ability to set zero stop, so you can sight the gun in, set the stop at zero and always be able to return to zero for accurate dialing from there.Related: Shining New Light on the Blackout
When you’ve got your rifle and your scope and some accurate ammo in an appropriate caliber, you’ll need a ballistics app to do the calculations for you. I use the Zeiss Hunting app, which is simple to use and can set up multiple profiles for different guns and/or loads. It also syncs to the Zeiss Victory RF rangefinding binoculars, so the binos will give you your holdover without having to look at your phone. It’s not an inexpensive system, but it’s a helpful one.
The Skills
Your rifle, ammo, scope and app are ready to go. Now it’s time to do your part.
First, long-range shooting requires a rock-steady rest, both on the forend of the gun and under the buttstock. At the range, this is done on a bench or from a prone position. In the field, you’ll have to create a steady rest using shooting sticks, a bipod, your backpack, the ground, a wadded-up jacket or a combination of other factors.
Second, long-range shooting requires that the shooter put as little movement into the gun as possible. On the bench, this means keeping your non-shooting hand off the gun and keeping your shooting-hand thumb pointing forward rather than wrapped over the top of the gun; this keeps you from squeezing and torqueing the rifle. You should execute the shot itself at your natural respiratory break — in between breaths. Every movement of your body affects the shot at 1,000 yards.
The Wind
“Being able to read wind is what separates good shooters from great shooters,” says Lund. Wind that might not be a factor at 100 yards will throw your shot wildly off target at 1,000 yards. Reading the wind — at the muzzle, at the target and at various points in between the two, which is the really tricky part — is an entire article unto itself, but it’s something that comes with practice.
Range time is the only way to really get good at this. In long-range shooting, we generally dial for elevation (using the holdover your app told you to use) and hold for windage, because windage changes frequently. You will use your reticle’s hash marks to hold left or right based on what the wind is doing. It’s important to remember how many MOA each hashmark represents, especially if you are working with a spotter on the bench who is calling the wind for you.
How Far is too Far?
Once you’ve honed your skills at the 1,000-yard range, you’ll be better prepared to take longer shots at predators than you have in the past. If you’re looking for me to put a number on it, you’re going to be disappointed — but what I will do is give you some considerations to think about when you’re determining how far you can or should ethically shoot at game.
First, remember that 1 MOA is 10.47 inches at 1,000 yards, and that’s larger than the size of the kill zone on a coyote. With a gun that’s capable of 1/2 MOA accuracy, if the shooter is perfect and the ammo is perfect and the conditions and wind are perfect, you should be able to hit the kill zone reliably. But when are all of those things ever going to be perfect, much less at the same time? One tiny misjudgment in wind or a minuscule tweak of the trigger finger can send the bullet off course.
Second, even if you could ensure that the conditions were perfect (no wind) and your shot would be perfect, the other factor you have no control over is the animal’s behavior. Depending on the caliber and projectile you’re using, it can take between 1 and 2 seconds for the projectile to travel to the target — and a lot can happen in a single second. If that animal takes a step, shifts its weight or rotates its body as you’re pulling the trigger, the shot isn’t going where you thought it would. Speaking of projectiles, they lose a considerable amount of velocity at distance, so it’s important to shoot ammo that’s specifically designed for long-range hunting to ensure proper performance once the bullet finally gets to the animal.
I’m not going to tell you not to shoot at game at 1,000 yards, but the above are all reasons to consider limiting yourself to a distance where the risk of wounding or not recovering an animal are lower. The old advice “if you can get closer, you should” is still sound.
The difference between 1,000 yards and, say, 500 yards is massive. Wind becomes less of a factor. The Coriolis effect (the curvature and rotation of the earth) becomes much less of a factor, and the math gets simpler. The bullet gets to the target faster and therefore leaves less time for the animal to do something unpredictable. And 1 MOA at 500 yards is 5 inches, so there’s more margin for error in the shot itself.
Wayne Gretzky famously said, “You miss 100% of the shots you don’t take.” That might be great advice in hockey, but it doesn’t apply to hunting. Hone your shooting skills on the bench and take what you’ve learned into the field to stretch your shots out farther than you have before — but temper your newfound confidence with plenty of sound judgment and respect for the animal.
Remington’s legendary 700 action gets a number of long-range-specific upgrades in the Magpul Enhanced model, including a 20-inch, carbon steel, heavy barrel, an M-Lok bipod mount with folding bipod (helpful for getting a steady rest), and a crisp X-Mark Pro trigger.
Guns and Optics
Most of today’s off-the-shelf hunting rifles are capable of 1 MOA accuracy or better. If you’re going to get into serious long-range shooting as a hobby, you might consider investing in a purpose-built long-range gun.
Remington’s legendary 700 action gets a number of long-range-specific upgrades in the Magpul Enhanced model, including a 20-inch, carbon steel, heavy barrel, an M-Lok bipod mount with folding bipod (helpful for getting a steady rest), and a crisp X-Mark Pro trigger. It feeds from a Magpul magazine (10-round mag included) and comes with a suppressor-ready threaded muzzle. Cheek risers and buttstock spacers are included so the shooter can adjust the stock to his or her preferences. MSRP on the Magpul Enhanced starts at $1,249
Optics are arguably more important than the gun in long-range shooting, and now is not the time to cheap out. You need quality glass with specific long-range features, but some of the price points in this category are jaw-dropping. With a street price of around $1,100, the Zeiss Conquest V4 6-24×50 offers considerable value for a surprisingly affordable price in the long-range market.
They are second focal plane scopes, and the ZBR-1 reticle offers plenty of options for holding for windage and elevation if the situation calls for it. With 24X magnification and adjustable parallax, as well as a substantial elevation and windage adjustment range and a multi-turn elevation turret with Ballistic Stop, this scope has everything you’ll need to get into the long-range game. Two reticles are available — The ZMOA-1 is less cluttered and thus probably faster to use, while the ZBR-1 gives you more options with many more hash marks on the vertical axis. Both reticles are available in illuminated or non-illuminated.
A ballistics app is a must. None of the available apps are exactly “simple,” because this is complicated math with a lot of variables, but I found the Zeiss Hunting app easy for a newbie to navigate and set up. Once you input the characteristics and data of your ammo (choose a factory load already in the app, or add data on your handloads), the app will use your phone’s location to update atmospheric conditions and spit out precise tables that give you the elevation you need to dial your scope to at any range, along with all sorts of useful data on velocity and energy at various distances.
Outdoor Solutions Long Range Shooting School
I’ve barely glossed over the basics in this article, but there’s no better way to build long-range skills than by attending an intensive shooting class for a few days. Outdoor Solutions offers a great option, and I took a long-range class at their Utah school in June 2019. Greg Ray founded Outdoor Solutions in 2004 as a booking service for hunting trips and has expanded it over the years to include long-range shooting schools held at some of the same lodges where he books hunting clients.
“Our mission is to show people that they can use good quality factory gear, factory ammunition, and still be successful,” Greg says. “We want to hit the mainstream, not just the people who can afford a $9,000 custom setup. We wanted to be able to hit the average everyday hunter and use good quality equipment that doesn’t break the bank.”
A class at Outdoor Solutions includes lodging and meals, two days of range time, small class size, high instructor-to-student ratio, and all the training and one-on-one instructing you’ll need. You’ll spend the first day on the range working your way out to 1,000 yards, and you’ll be learning spotter skills as well as shooting skills. You’ll also be figuring your ballistic data via an app — which is an incredibly helpful step toward shooting independence.
On the final day of class, you’ll be in the field all day, shooting in realistic hunting scenarios from field positions, utilizing shooting sticks, backpacks, or other improvised situations to get a solid rest. This field day is one of the major things that sets Outdoor Solutions apart from other long-range schools, and it allows you to discover all the little things that change from the bench to the field — the kinds of things you don’t want to encounter for the first time when you’re hunting.
Outdoor Solutions holds classes in Texas, Utah and Michigan. They’ll provide the gun, optics, and ammo, or you can bring your own if you prefer, as long as it meets specific course standards. No experience is necessary — our class included a bowhunter who hadn’t fired more than a dozen shots from a rifle in his life, and he was ringing steel at 1,000 yards in a matter of hours.
With some of the top instructors in the country and a genuine focus on helping you learn to hunt — not just shoot — at long range, an Outdoor Solutions course is an excellent option if you’re looking to expand your skills.
Before taking to the field, there is alot for a hunter to consider. Between shooting fundamentals, actual fieldcraft, and the packing and processing which occurs after a successful shot, hunting requires a wide range of skills, many of which must be executed in concert. As the mantra goes however, fundamentals are key, and very little on the list above even matters without a firearm capable of hitting its target. So how does one go about getting a gun from out of the box to on target? Step one in the process is boresighting, or in layman’s terms, the process of aligning one’s sights with the direction of the barrel.
Tools of the Trade
There are quite a few ways to go about this, however most involve gear to get the job done. Laser boresights are one of the most ubiquitous options, as they are fairly affordable, easy to store, easy to power and easy to use. What most of them entail (though design does vary) is a small “cartridge” with a laser pointer inside. It is turned on, loaded into the chamber like a regular bullet, then aimed (in a safe direction) at a target of one’s desired distance. A laser is projected at that point, and the sights can be adjusted laterally and longitudinally until they meet the point of the laser–boresight achieved.
One downside can be accuracy, however. On cheaper models, the laser can actually be off-center in the “cartridge,” which can lead to a boresight that is farther off from accurate than desired. Models that mount to the end of the barrel can alleviate this issue, but are often more expensive. Further still, prior to the advent of these helpful little devices, there were a number of different tools that rose and fell in popularity (and do still exist), including contraptions that mount to the end of the barrel and provide a makeshift target that is perfectly aligned with the bore.
Toolless Tinkering
While these sorts of things work, you can actually boresight just fine (if not better) with no aids at all. All you need is a proper shooting rest (sandbags will work) and a good target. Set the target at 100 yards (or less if needed–remember, this will not be your final zero), and place the rifle into your rest. Once the rifle is secure, remove any caps your scope may have over its adjustment turrets. While this step may seem out of position, it will become clear why in a moment. Remove the bolt and stare directly down the bore of the rifle. Pick an easily identifiable shape on the target, and put it as close to the center of the bore as possible. Now comes the tricky part. Without bumping your rifle, move up and look through the scope. This is why removing your turrets first is important, as unscrewing them will almost always upset the gun, necessitating you to restart the process. Adjust your elevation until it is in parallel with your intended target, then bring your windage in until the crosshairs are directly over your target.
Double check through your bore one more time that your rifle has not moved, and make any adjustments necessary if it has. From here, you are boresighted and ready to move on to actual zeroing.
Once upon a time, hunters and long range shooters had little overlap. Long range shooting guys tended to spend their time behind heavy guns, discussing the intricacies of ballistics and the art of wind-reading, while hunters worried about scent control, and ensuring their rifle was “minute of paper plate.” Those days, however, are long gone. Now, with hunters hiking further into the backcountry to fill ever-more sought-after tags, with ever-more expensive gear, the limits of ethical shooting have been pushed further than your grandad’s iron-sight .30-30 could ever have dreamed. As such, it’s become increasingly wise for hunters to consider the merits of learning a little more about long range shooting; after all, missing a tag that takes 15 years to pull hurts a little worse than missing a doe on the farm, and ensuring every shot has an ethical chance of being lethal should always be the paramount consideration for a responsible hunter.
Long Range Shooting: How Necessary is it Really?
While I can hardly speak for everyone, particularly in this more modern age, when I started hunting I knew two things: that my rifle could knock out an eye at 100 yards (I went a little beyond “minute of paper plate”), and that if there was a stiff wind, I should aim a bit into the breeze. Imagine my shock when my first chance at a deer stepped out at 405 yards, and I had never even considered that drop.
As it turns out, the story has a happy ending. My hunting mentor handed me his rifle, which he knew like the back of his hand, and gave me an estimate of the drop in inches. I squeezed the trigger, and my first doe was down. What I mostly gleaned from that hunt, however, was how little I actually knew, and how much I had overlooked in my preparation. While I had been shooting on the family range for my entire youth, all my targets were static, and my distances pre-figured. In the field, the environment was dynamic and the shot situation fluid. This sort of shooting would require a whole new know-how.
The Benefits of Long Range Shooting Training
This know-how, of course, is precisely what long-range training instills in students. To start with, students are not just given an in-depth familiarity with a rifle and scope system, but are taught how to achieve that familiarity with their own rifle, or any system they use in the future. The common ways to measure shot elevation–MOA and MRAD–are discussed, alongside the various reticles and turret options that allow a shooter to figure said drop, and the methods and tools which help a shooter ascertain target distance.
And that is just the beginning. When you step out onto the range, it becomes patently clear why all these inputs matter—important as they are, they are only the groundwork. Even once you have your mechanics dialed in and your dope card set, the environmental conditions step up to throw a wrench in things. Wind, of course, is a huge factor, and how to both read and deal with it is discussed and taught. Shot angle, often overlooked by the layman shooter, can easily cause a miss, and must be taken into account. Even such small details as elevation and humidity can cause hiccups, though those won’t come seriously into play unless you’re really pushing the distance. Then, of course, comes my favorite part. You often aren’t shooting prone, or off a bench in the field. Can you still shoot when you’re not in the perfect position?
Finding the Right Long Range Shooting School
Frankly, I could go on for another several pages about the intricacies and hunting benefits of long-range training, but as I haven’t nearly enough room to cover everything this entails, let me close with one final consideration. Finding a long-range shooting school appropriate to your interests is of prime importance. As mentioned, there are several popular styles of long-range shooting far removed from the sorts of practical skills hunting requires, and while you will certainly learn and benefit from a class with benchresters, the positives will not be nearly as great as from a class designed with long-range hunting in mind. Several schools have popped up around the country offering just this specialized blend of training, prime among them being Outdoor Solutions, which prides itself on tailoring its programs specifically to what hunters need to know. Wherever you decide to go, however, make sure you get some training behind the trigger before you pull it in the field. Your freezer will thank you.
So. You’ve bought your first hunting firearm, become proficient with it, and selected ammunition with both acceptable accuracy and terminal characteristics. You’ve gone to your local sporting-goods store, picked out a camo pattern you think will fool all the big bucks, and are ready to hit the woods. Now what? Here are a few basic hunting tips for beginners to think about before you go chasing your first deer, or other game animal.
There is absolutely nothing worse than having to contend with a shiver on your shot, on top of the usual adrenaline-induced shuddering. Make sure you layer effectively. If you’re sitting in a treestand, the thicker the insulation and the heavier the garment the better. If you’re hiking around the backcountry, a larger number of thinner garments will be required, so you can shed layers when walking and put them back on when sitting still. Failing to do so will result in the sort of sweat that freezes quickly when your body temperature drops back down. I’ve always found merino wool makes an excellent layer to put right by the skin for its excellent combination of breathability and warmth.
Hunting from a treestand? Try to practice some shots at an aggressively downward angle before you have hair in the scope. Heading for the backcountry? Try shooting off tree limbs, shooting sticks, tripods and prone. You may be a great shot off the bench, but learning to shoot from real-world positions is another matter entirely. While you’re at it, make sure you study the vital areas of your target animal. Shot placement is, after all, the terminal point of your angle.
Bring a rest.
Very few shots will feel as good offhand as they do rested. No matter what sort of hunting you’re doing, bring something you can rest your rifle on. If the eastern deerwoods are your domain, with close-range shots being the norm, something like a simple shooting stick should suffice. For longer distances, learn how to brace off of a backpack while prone, and consider packing a tripod in case obstacles or shot-angle make a prone shot impossible. This brings us to our next tip, which is …
Tote a backpack.
Make sure you bring some sort of backpack with you. It doesn’t need to be the most expensive, with the lightest frame or the comfiest padding; but whether in a treestand or on foot, you’ll want somewhere to quickly stow extra layers, snacks, and equipment.
Tell a friend.
Particularly if you’re headed out onto public land solo, make sure you tell someone where you’ve gone, and set a time to check in with them. Better yet, being that you’re a beginner, bring a mentor along with you (but we all know that’s not always an option).
Sure, you don’t need to become a wind-reading expert before you drop your first doe, but having some idea of how to adjust your shot in less-than-ideal conditions before you hit the woods will give you endlessly more confidence when it comes time to make the shot.
Learn about the basic signs made by your quarry.
While much of this will come with experience and time in the woods, you can certainly give yourself some good basics to start. What does a buck track look like versus a doe? What do different sorts of droppings look like? What is the difference between a scape and a rub? Answers to all these can be found easily online, and will give you signposts to scout for while you’re out and about. In addition to being beneficial to your hunt, this will also keep your mind active, and make the slower parts less boring. (Buck tracks are more squared at the ends, and doe tracks more rounded, if you were wondering).
Don’t take everything so seriously.
Is gun-safety of prime importance? Yes. Is ethical shot-placement, and acquitting yourself to the best of your ability absolutely crucial? Of course. But the rise of hunting social media has given everyone a slightly skewed idea of hunting these days. Mistakes happen. Misses happen. Not every shot is your finest hour. So don’t forget to have some fun out there. The less you’re worried about missing that big buck in your crosshairs, and the pictures you plan on posting of it later, the better the chance you’ll actually have some pictures to post. Hunting is a pastime that is enjoyable for its own sake–it’s not just the dogged pursuit of a trophy to show off to your friends. Treat it as such.
Hunting Tips for Beginners Bonus Tip
I was going to stop at eight, but I just thought of one other thing. Make sure you know how to clean your quarry (or are with someone who does) before it’s lying dead on the ground. The amount of stories I’ve heard of people who killed an animal, then had to call for help as they had no idea what to do with it, would astound you. For many reasons, but this one most primarily, I cannot recommend an Outdoor Solutions Field to Table event highly enough. They will show you what needs to be done on the animal long before you take to the field. As someone who learned in the dark one chilly November day as a teenager, take my word for it: you’d rather take a class.
Few environmental factors are as important to hunting as how to read wind direction. From where to sit and whence to stalk, or whether a deer walks into your crosshairs or blows out the country, wind plays a vitally important role in a hunt. Most critically, wind can play a huge factor in shot placement, particularly when executing a shot at distance. Learning how to read wind direction, therefore, is of crucial importance. So how does one go about doing this? Read on for some fundamental tips.
Figuring Direction
You’ve doubtless heard old timers say the best way to tell which way the wind is blowing is to wet a finger and stick it up. While I can’t argue with the efficacy, I’ve got news for you. If this method is working for you, the wind is likely strong enough to make it plainly obvious where the wind is coming from–it’s incredibly difficult to determine the direction of a light breeze with a wet finger. It’s far better to watch your surroundings. Trees, grass and other soft flora can give a great indication of what the wind is up to. If you can’t find any of those to use, or if you want an even more certain indicator, carry a small squeeze bottle full of talcum powder into the field. One spritz into the air and you’ll know for sure which way that wind is going. Figuring out direction is only half the battle, however. Once you have a handle on the wind’s direction, you need to figure out its speed.
Going by Feel
Some good general rules for how to read wind direction are these. A wind of 5 mph or less will feel like a light breeze on your face. A wind speed from 5-10 mph will start to blow leaves and such across the ground, and can be heard audibly. Ten to 15 mph and you’ll start to see trunks swaying
Eyeballing It
Want something a little more scientific? Mirage—aka: the heat-induced shimmer you can see through your optic—is another great way to check wind. Take a look through your scope. If you’re shooting on a relatively flat field with a visible sun heating the ground, you should be able to see an accurate mirage. Beware, shooting across hillsides and over brushy foliage can disrupt your mirage, so also rely on your surroundings when figuring direction. If the mirage is telling you the wind is right to left, but you feel/see it going left to right at your position, the mirage is likely being affected by wind funneling around an obstacle.
Nonetheless, it can still be a great way to determine speed. A mirage that boils (the lines go straight up and down) indicates a wind value of zero. A mirage that slants slightly is indicative of a slow wind under 3 mph. A mirage that slants aggressively will indicate a moderate wind between 5 and 8 mph. Finally, a fully horizontal mirage indicates a strong wind between 8 and twelve mph. Any higher, and the mirage will start to blow out, and disappear.
How to Read Wind Direction By Going Scientific
The only foolproof way to determine windspeed is with the use of a wind meter, such as the ubiquitous models from Kestrel Ballistics. Simply orient the meter to the wind, and it will give you an exact reading. Once you have that information, however, what do you do with it? First up is determining whether the wind is a full value (blowing from your 3- or 9-o’clock), quartering (blowing from 1:30, 4:30, 7:30 or 10:30), or dead on (12- or 6-o’clock). For a full value wind, you use the exact ballistic data calculated for your measured windspeed (calculating windages is a topic for another time). For quartering (or roughly quartering) you multiply that value by 50 percent, and for a dead-on, you ignore it entirely. Of course, the intermediary angles technically require different calculations (a half quartering wind would be 25- or 76-percent, for instance, depending on whether it is closer to dead on or full value), but for ethical hunting distances, those three basic calculations will serve you more than adequately.
Isn’t Wind Variable?
A wind meter is all well and good for determining the wind, but what if it’s not consistent? You have two options should this occur. First, you can measure your high and low wind speeds, adjust your hold for one or the other, then wait until wind hits that speed to make your shot. That can be a tricky proposition when dealing with skittish animals however, and you risk missing your quarry.
Wind bracketing may work better for your hunting scenario. Measure the highest and lowest wind value, then average the two and use this as your hold. While not as precise as the former method, it is perfectly adequate at common hunting distances, and will ensure you can squeeze the trigger whenever a shot presents itself, rather than having to wait for the perfect coincidence of sight picture and wind speed.